Configuration
Quick Guide
Configuration Guide
Get quickly started with Flying Upload. Just a few simple configurations to upload on all available platforms in the tool. Let’s begin!
.
.
1. General Information
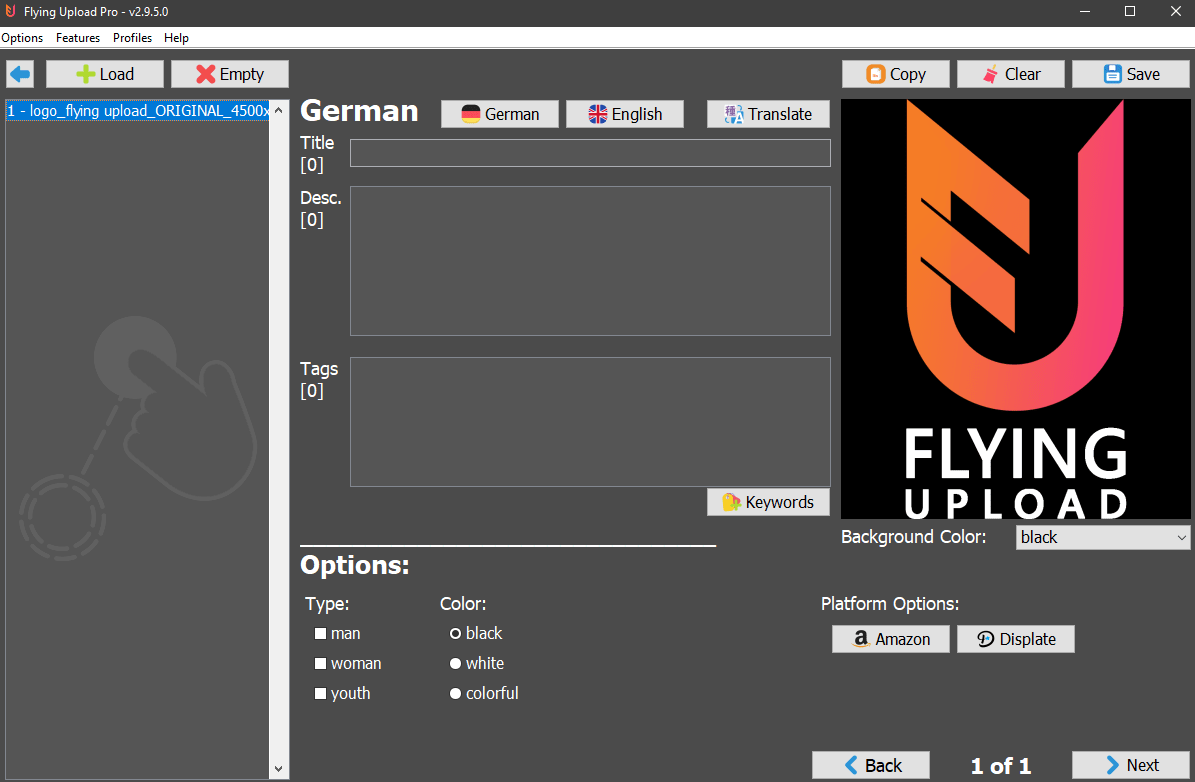
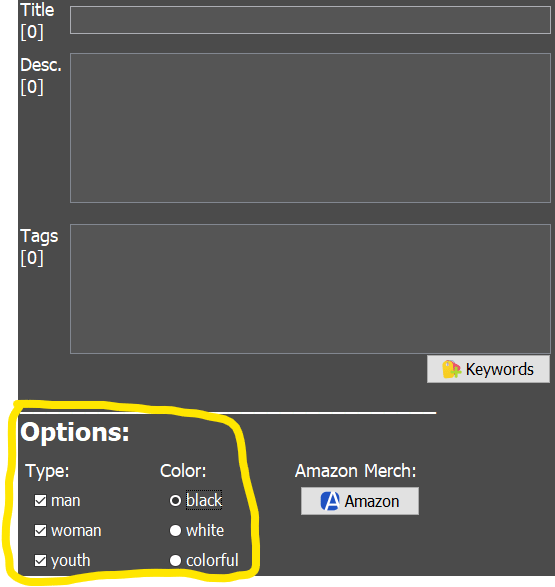
You always tag your designs in the “Edit Window”. Simply add title, description, tags, and your options for your design. This is all the data Flying Upload needs to upload on most of the platforms. You don’t have to copy anything or look that everything is in the right row. Tag your design one time and you have it for all platforms saved forever! No Excel based program can do this. Flying Upload is simple and clean.
.
…
.
2. Platforms Without Template
- Teepublic
- Society6
- Threadless
- Tostadora
For this platforms you just have to edit your design in the Edit window. Simply add your title, descriptions and tags, configure it with your options “man / woman / youth” and set your preferred colour – finished! Now you can already upload to Teepublic, Society6 and Threadless. Flying Upload will set the background black / white or colorful for man, woman and youth based on your configuration. Try it, uploading was never so easy and fast.
Additional info for Society6: You can go to “Templates” within our tool and choose what categories you want to upload. The upload process on Society6 is very time consuming, so you can deselect categories you don’t want. It’s optional, so if you configure nothing the upload will simply run for all available products.
2.4 Tostadora
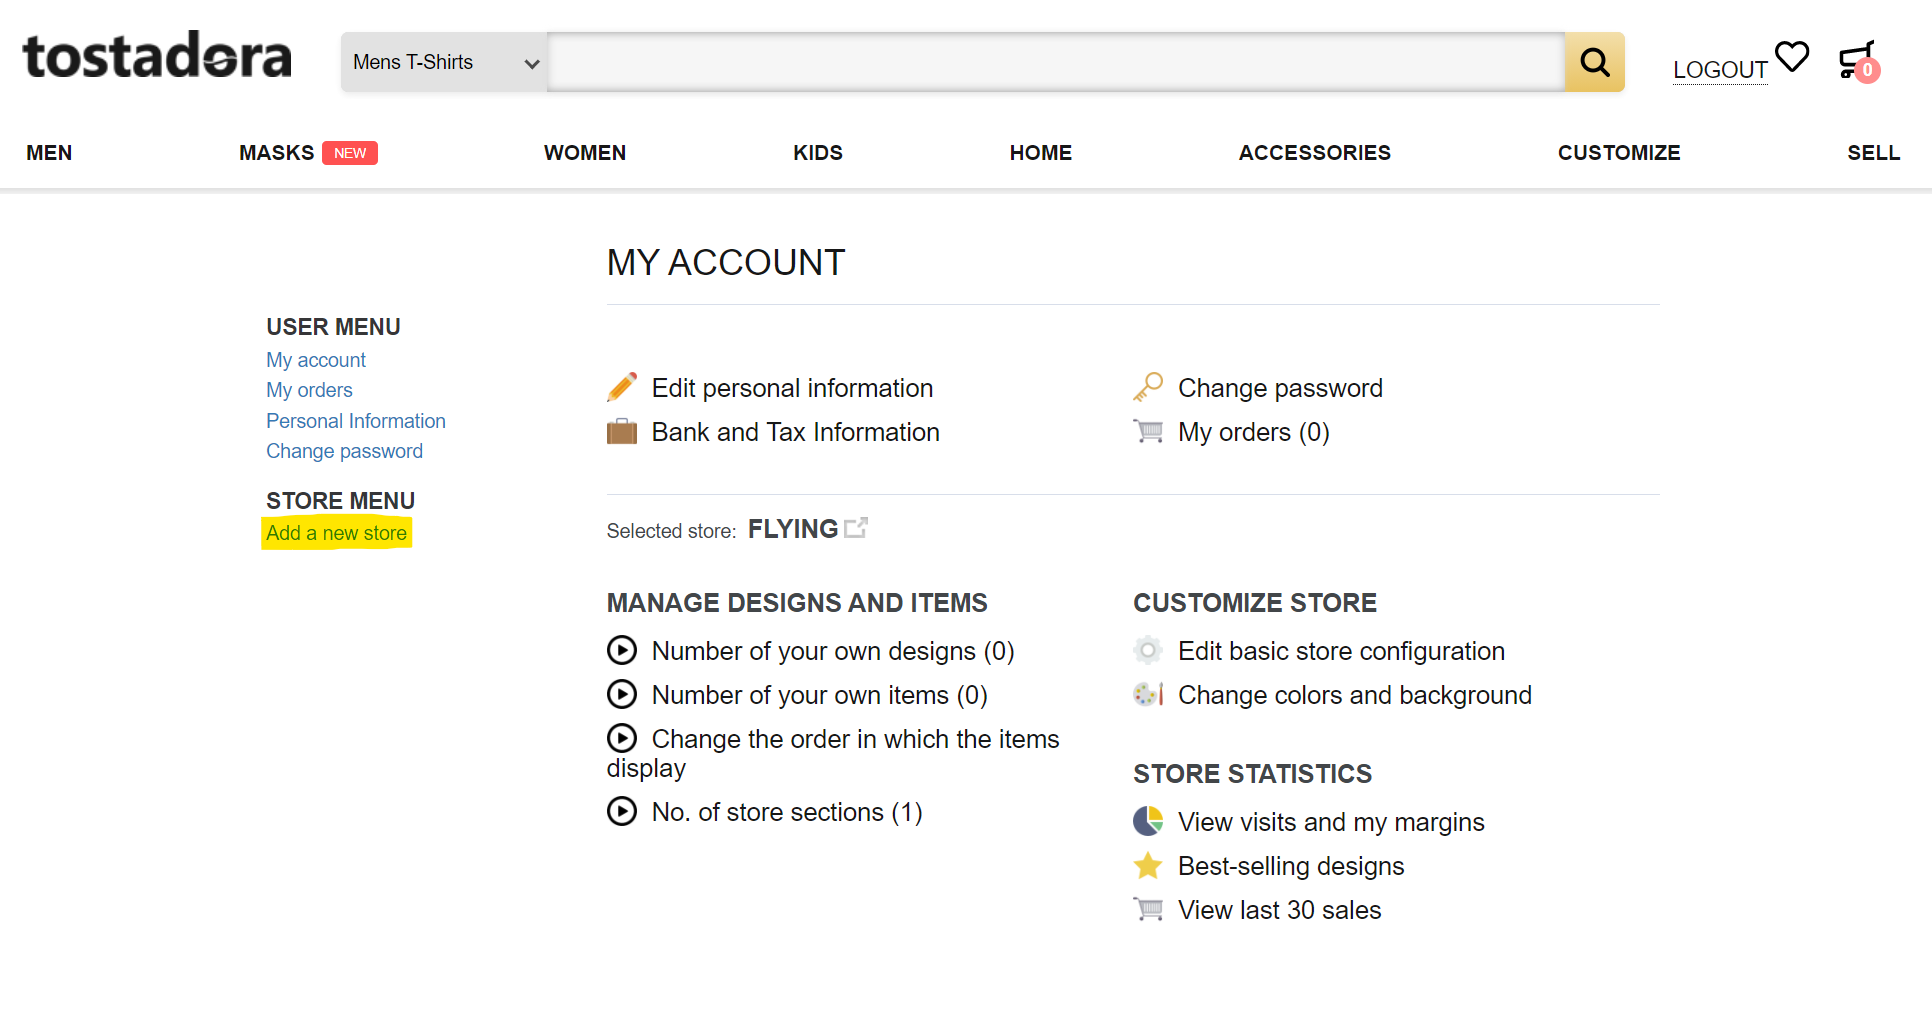
To upload you need first a store. You can find this on the left side –> Store Menu –> Add a new store
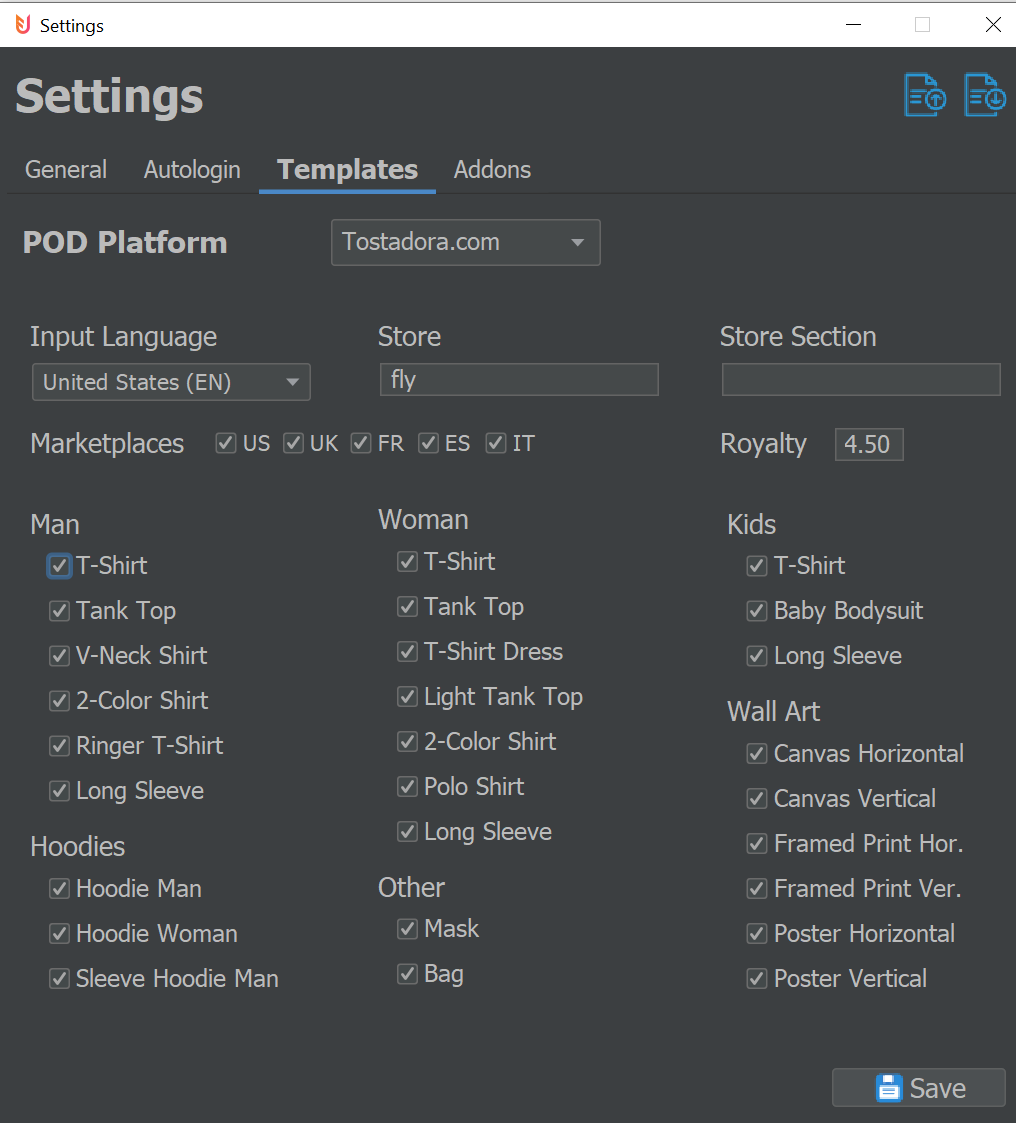
After that you can go to Flying Upload to Options –> Settings –> Templates –> Tostadora. Enter your input language, store name and store section if you have one. Enable your marketplaces, set the royalty and select the products.
This is everything you need to configure! You are now able to upload your listings to Tostadora. Good sales!
…
.
3. Platforms With Template
- Redbubble
- Spreadshirt
- Teespring
- Shirtee
Depending on the options you set in the “Edit” window, the right template will be chosen for you. To configurate your templates go to “Options” → “Settings” → “Templates”
…
3.1. Default Template
To upload on a platform which is using a template (Redbubble, Spreadshirt, Teespring, Shirtee) it is necessary to configure a default template.
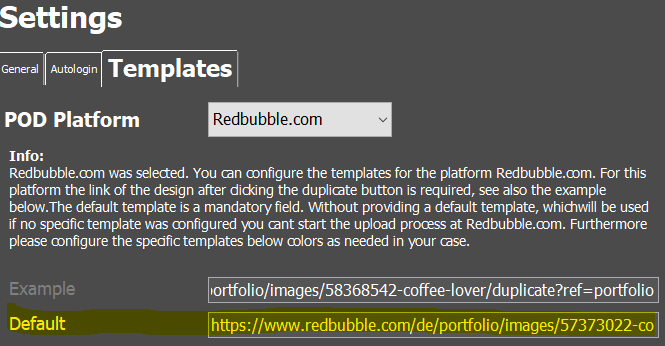
If no specific template is deposited Flying Upload will take the default template. When every specific template is provided, Flying Upload will always find a template and will never take the default.
 .
.
…
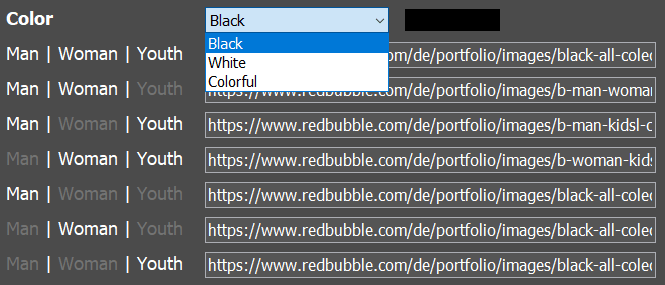
3.2. Specific Templates
Example 1:

You tagged your design for man and woman for the shirt colour black (or dark colors). So when you upload on Redbubble for example, Flying Upload will take the template you configured for Redbubble colour black for man and woman (marked yellow).
Example 2:
This time we have configured the design in the edit window for youth with the colour white. When we now upload on SpreadshirtDE for example, Flying Upload will take the template for “Youth” for colour “White”.
Example 3:
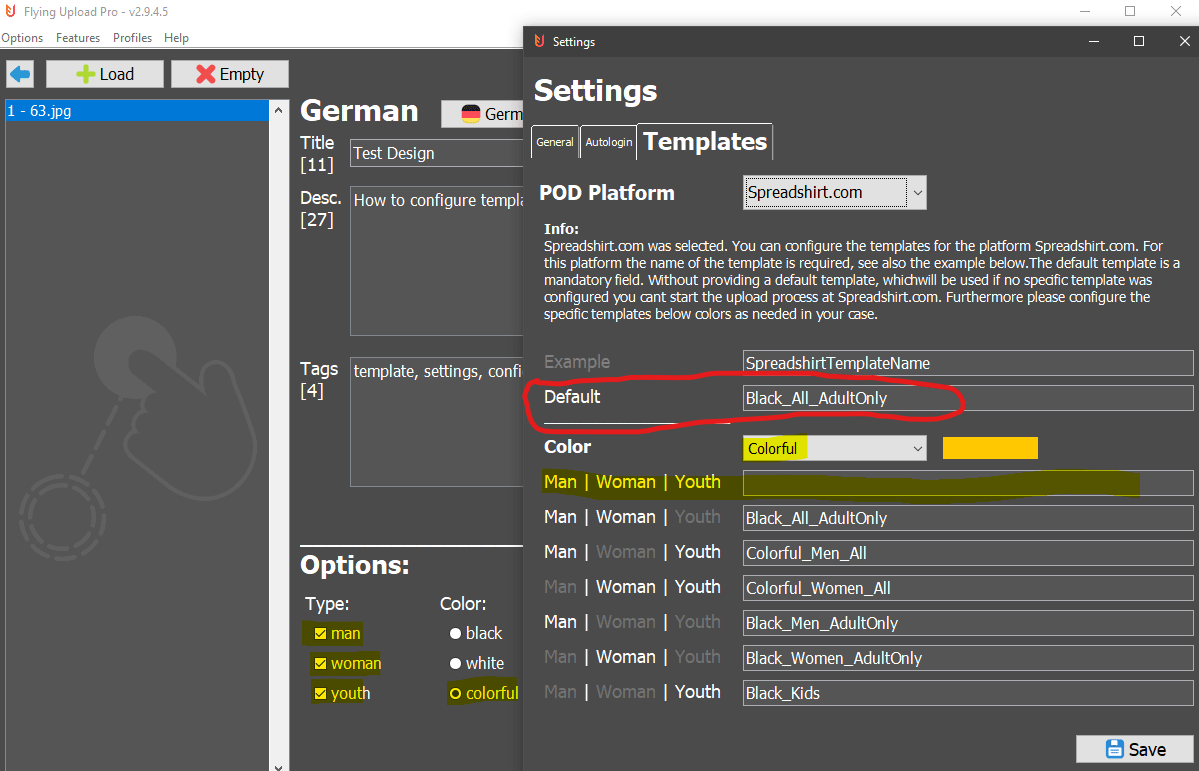
And now an example when the default template is used. Your design is configured for man, woman and youth with the color colorful (this option is for designs which can be printed on probably all colours from black to white). As an example we could upload to SpreadshirtCOM. So Flying Upload would try to take the template for the configuration (man, woman, youth with colour colorful), but this time the specific template is empty. So in this case Flying Upload would take the “Default Template”, so that the upload is not interrupted. And this is why the default is necesarry.
If all your designs are always for man, woman and youth and the colour black, it would be enough to configurate this specific template.
Where can I find the links and settings on every website to configurate Flying Upload?
It is simple and you only have to do it one time! You can always work with this templates. When Redbubble is adding a new product like masks for example, just add the new product (masks) on your templates which you used in the settings of Flying Upload and from the next upload onward your designs will also be on masks.
…
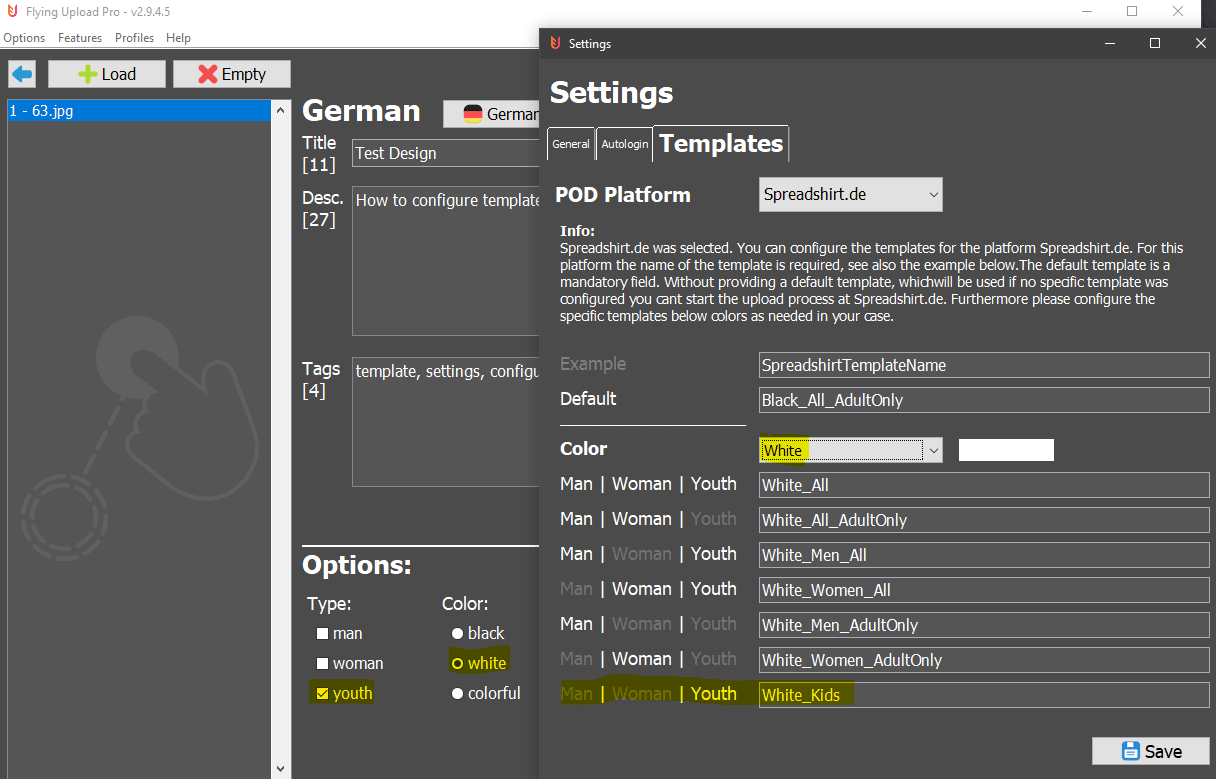
3.3. Spreadshirt EU and Spreadshirt COM
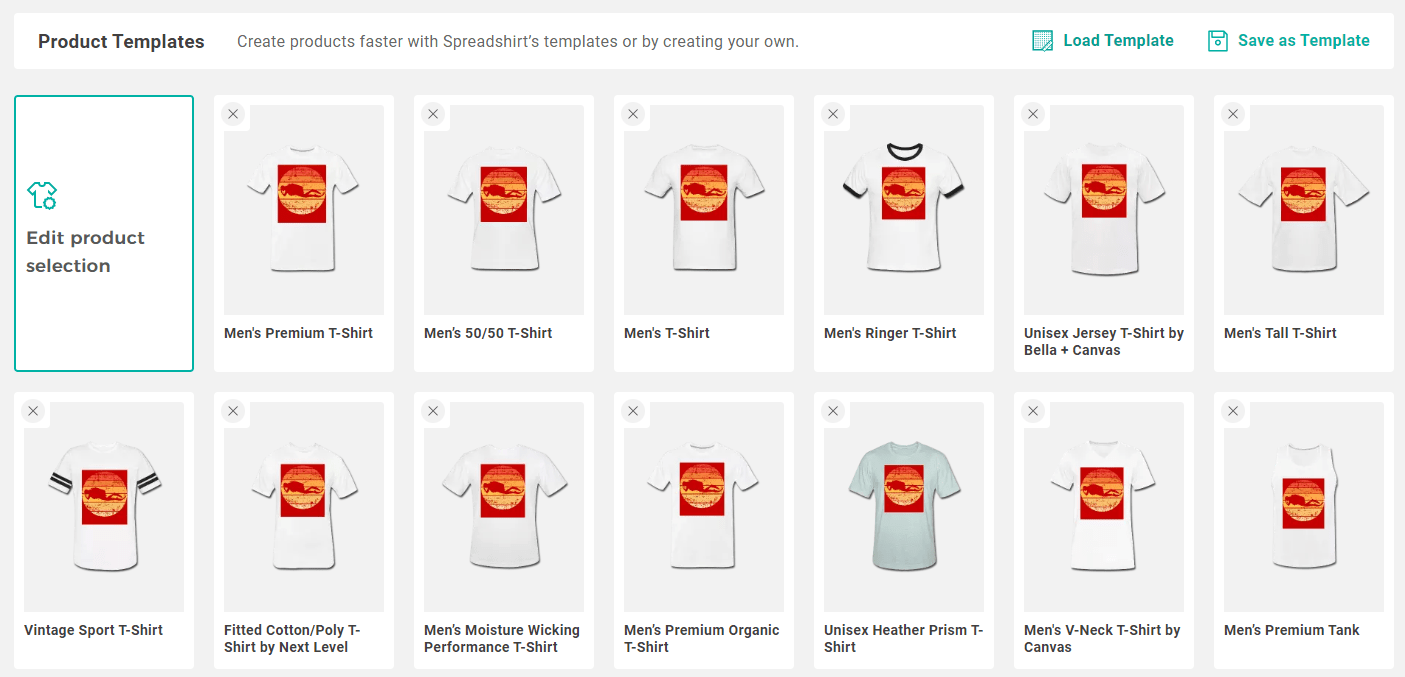
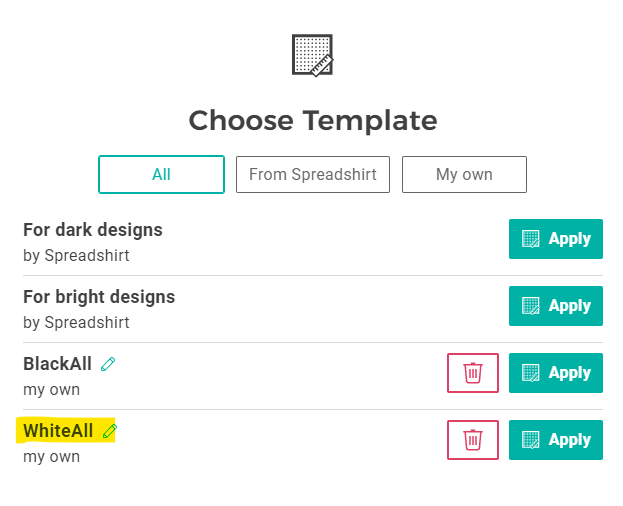
Add a design and configurate the template on Spreadshirt like you want. For example like in the screenshot for white shirts. Click on “Save as Template”. You can then give it a name, like “WhiteAll”.
When you click on “Load Template” your configured Template should now be saved and visible. You can now set the name of the template for your Spreadshirt configurations in the Settings Window. You are now ready to upload to Spreadshirt.
…
3.4. RedBubble
Add a new artwork or take one you already have and add all the products you want to have in your template.
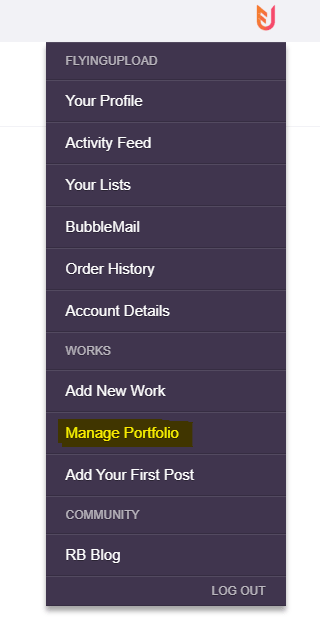
You can now go to “Manage Portfolio” where your artwork is that you want to use as template.
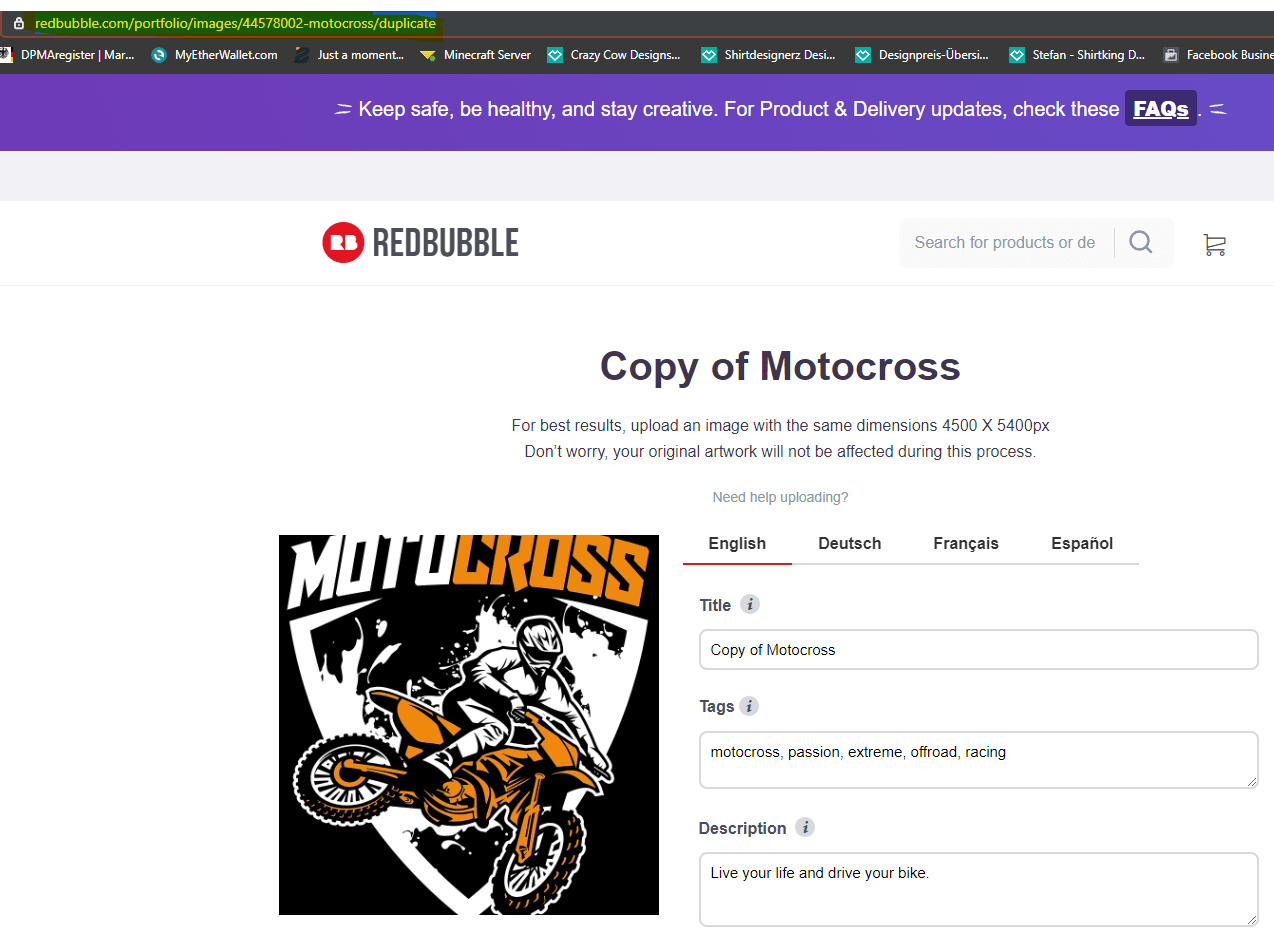
Click on the design you want to use as template and hit “Copy settings”
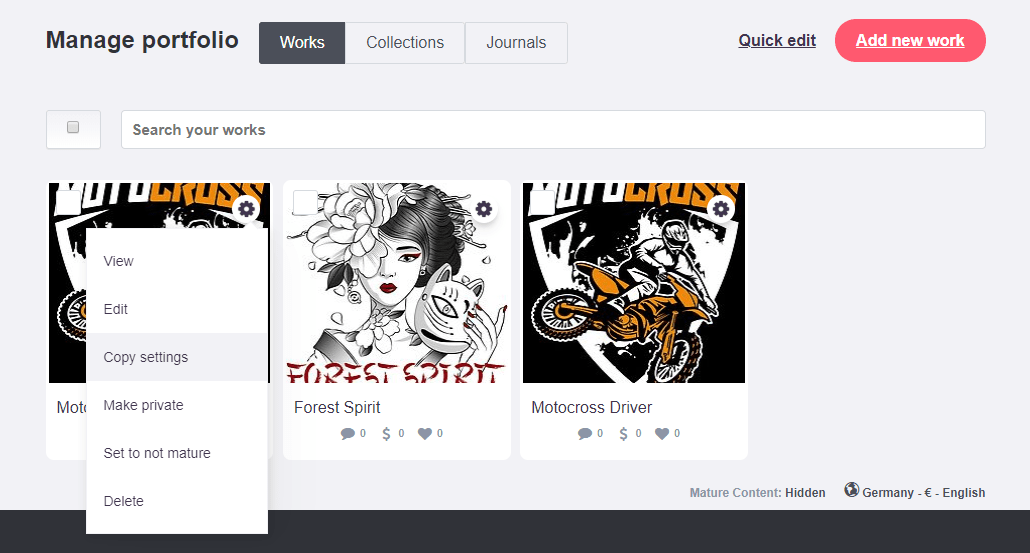
Copy the complete link and add it to the Redbubble template you want. You are now ready to upload on Redbubble.
…
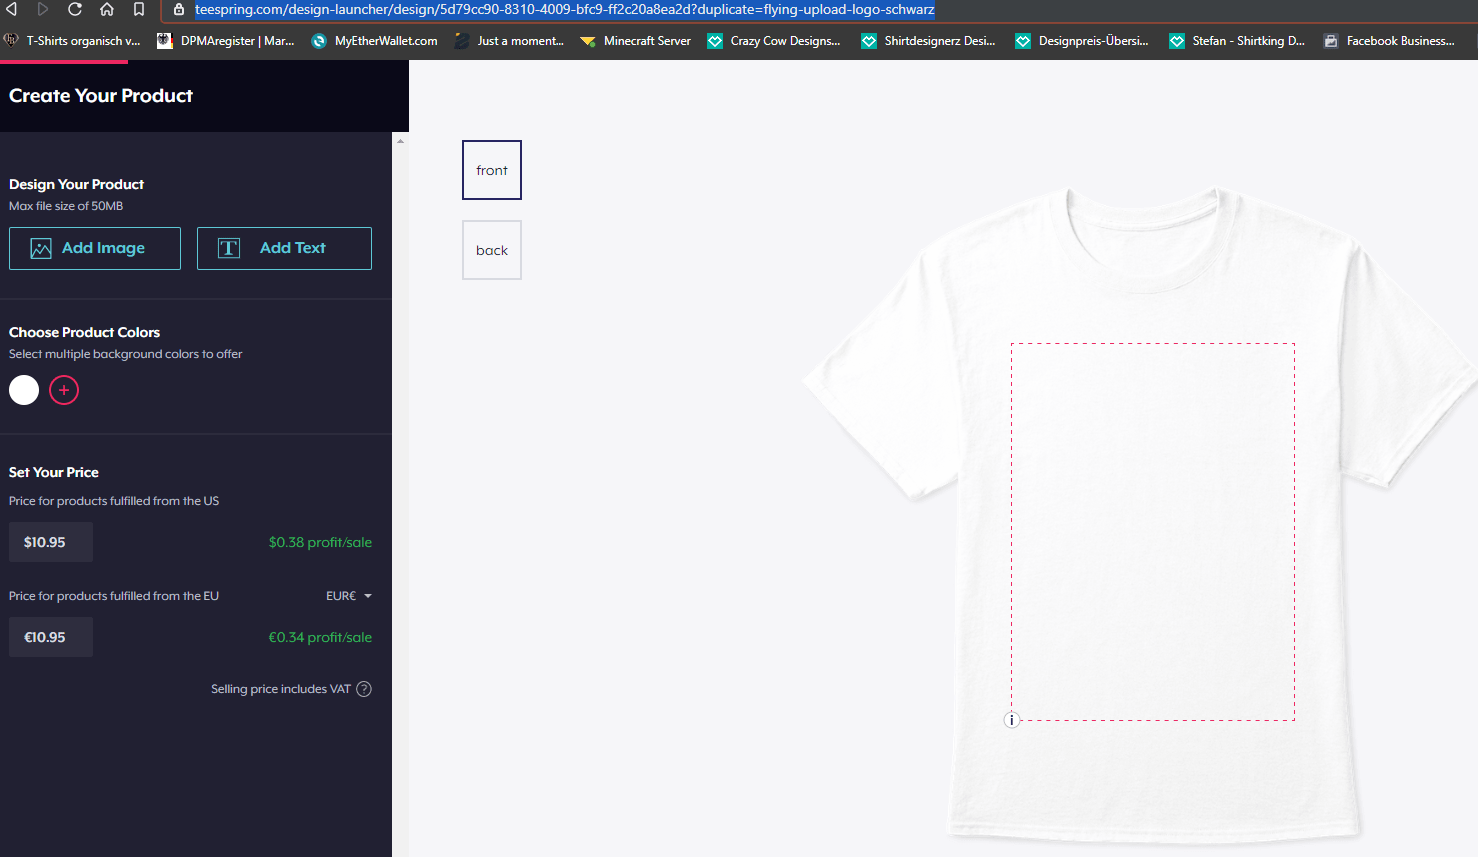
3.5. Teespring
It is usually the same as Redbubble. You can click on “Start Designing” and upload a artwork with all the colours and products you want to use for your template. After that you can go to “Listings” and click on “Duplicate Settings” for the design you want to add as template

As before just copy the whole link into the Teespring template you want to add in the Settings Windows. Finished! You can now upload on Teespring
…
3.6. Shirtee
Easy like the others. Click on “Design and Sell” and configurate the design like you want the template.
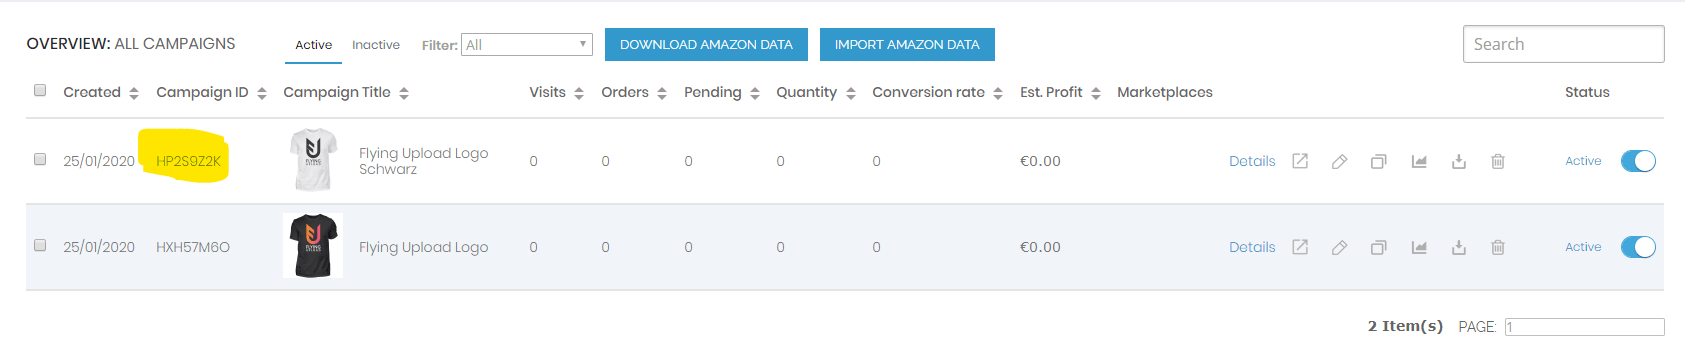
Shirtee checks your design, so till your design is live it can takes a few days. However, when your design is live, just pick the “Campaign ID” and add it. Finished! You can now upload to Shirtee!
…
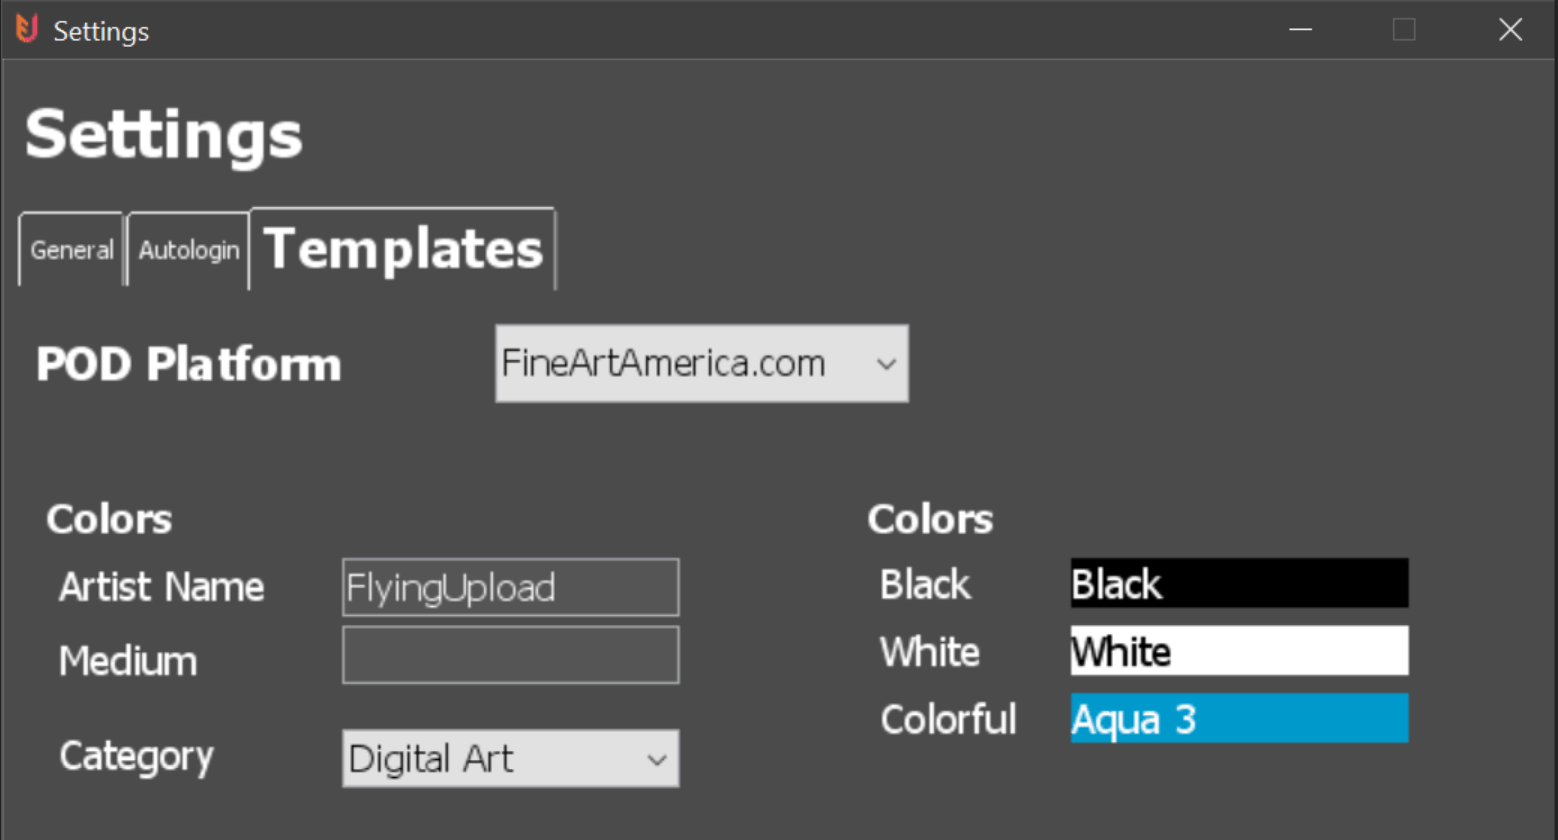
3.7. Fine Art America
Fine Art America has some necessary information like the Artist Name and Category you have to enter for once. You can configure it in the Settings Window under Templates. You can also choose from a color selection what colors the customer should see for black, white or colorful. Medium is optional, you don’t have to configure it! That’s all, the upload is now working.
…
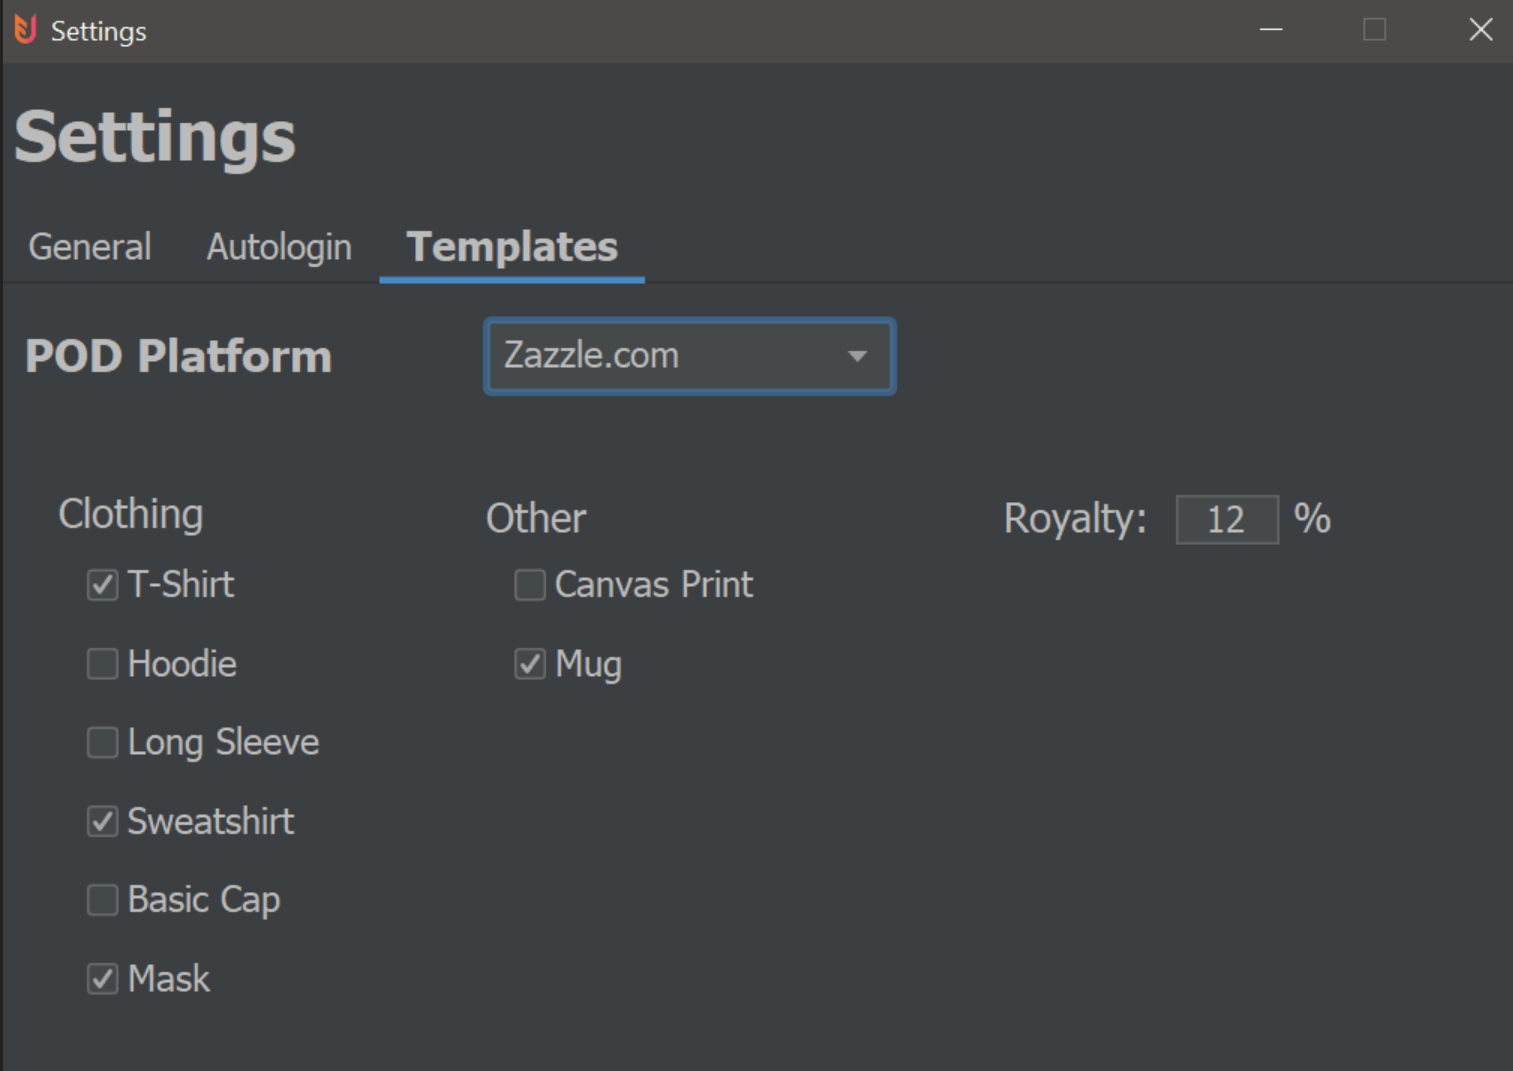
3.8. Zazzle
This platform has a lot of products. And with a lot, we mean a lot, lot. We offer right now all the basic POD articles in the Zazzle template settings. You can check every product you want and based on your edit the products for man / woman / youth will be uploaded. Please keep in mind that every product is a single upload. So 1 design for example could be 15 uploads at once.
If you have any products in mind we should at to Zazzle, please get in touch with us via mail or discord. Thank you very much for your help!
…
3.9. Printful
Here we have the first fullfiller platform of Flying Upload. Printful is a service that prints and sends your order to customers if they buy something from your online store. Right now we support Shopify, Etsy, Amazon and eBay. You configure your template, mockup and prices on Printful and it will be synchronized with your store.
General Settings
1. You must have an active store
2. Your store has to be synchronized with Printful
3. Please keep care that the data (store name, template) you enter in the tool matches exactly the data in Printful
How an upload works for:
Shopify and Etsy
Everything shown from configuration to upload
——————————————————————————————————
Amazon

1. Configure your Amazon store name from your Seller Account
2. Add a Flying Upload Template name (this has nothing to do with Printful and can be named like you want)
3. Printful Template: A template for a product you created on Printful
4. Mockup Style and Image
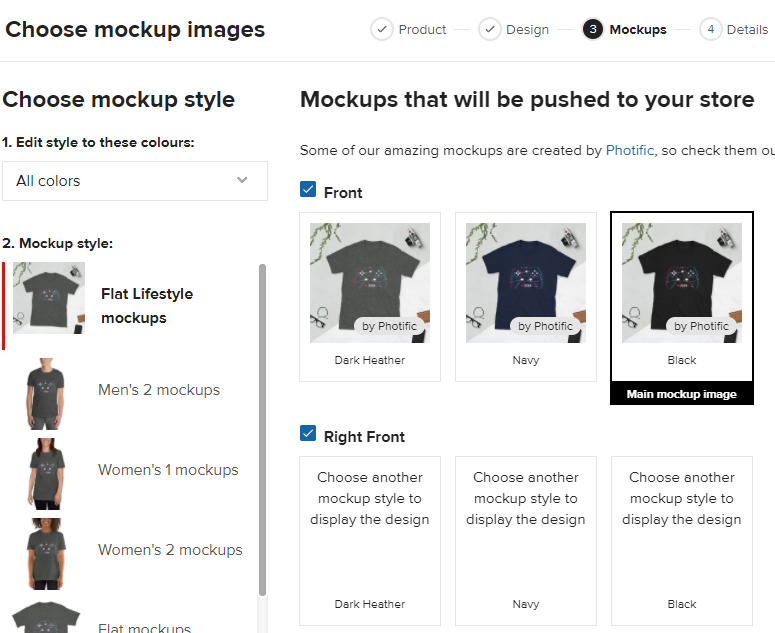
Select the mockup style on the left side and copy the name in the field. On the right you can choose your mockup image that will be shown to your customers
Note: Sometimes the mockup images have the same name. You can decide if you wanna choose the Front, Right Front or whatever. Just add for example “Front >” before the mockup image name. So in this case it could be “Right Front > Navy”
5. Product Name
The name of the product in your template. T-Shirt or Mug for example. If you check “add to Title” it is for example: Funny Gaming T-Shirt
6. Price
Choose “Fix Price” if all your sizes have the same end price. For example 19.95 for every size of the shirt. When you check Profit this will be added to the normal Printful price. A shirt with size s could cost 18.95 and a XXL Shirt 20.95. You will earn the same profit for everything
7. Measure
We suggest to let them both checked all the time. Measurement sizes in cm and inch. Information for the customer about the single sizes.
8. Free Shipping
Self exlpaining
9. Marketplace
The marketplace/s you want to publish your product. Please keep in mind, of course you can only publish on the marketplaces that are enabled in your Amazon Seller account 🙂
10. Exclude
In Flying Upload you edit your design for types “men / women / youth” and also a colour “black / white / colorful”. It does not make much sense to publish a black design on a black shirt. To make sure this never happens you can exclude specific settings. In the example above: Every design that is edited for white or colorful will NOT be uploaded with this template. It’s excluded
Note: By clicking “Deactivate” you can enable / disable a specific template. So you are able to upload on multiple templates at once.
——————————————————————————————————
Ebay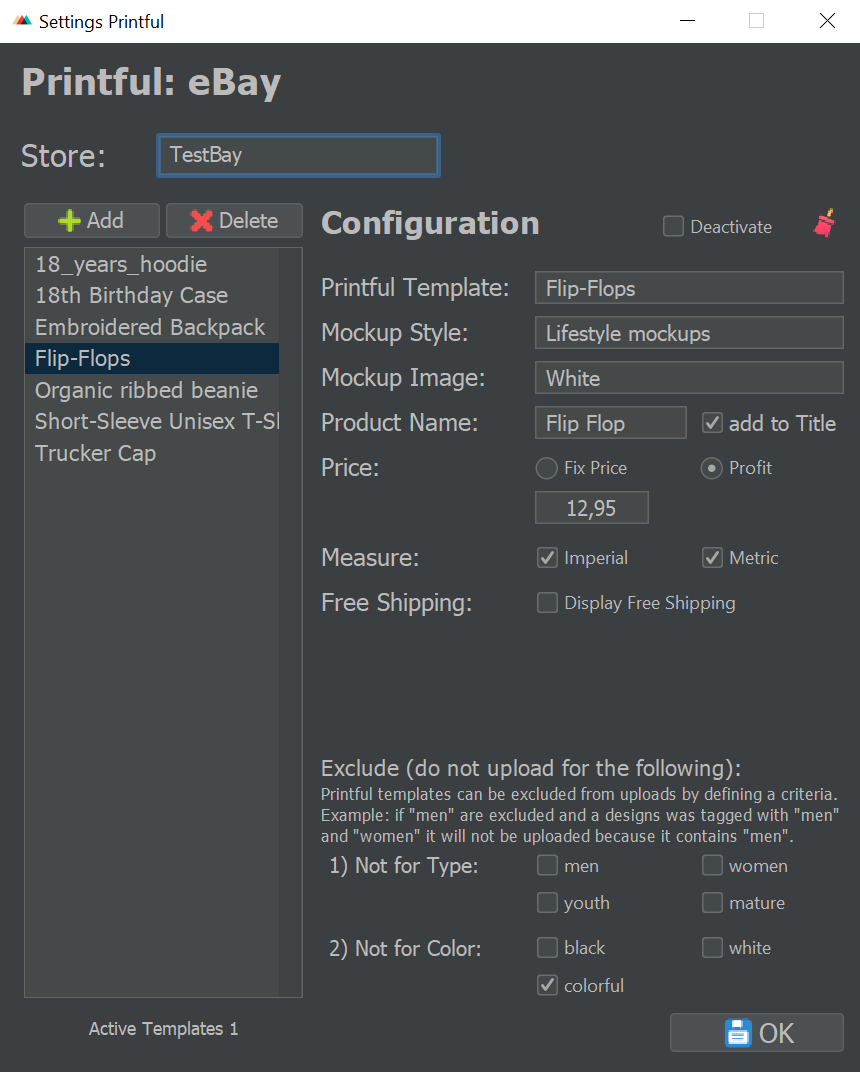
1. Configure your eBay store name from your Seller Account
2. Add a Flying Upload Template name (this has nothing to do with Printful and can be named like you want)
3. Printful Template: A template for a product you created on Printful
4. Mockup Style and Image
Select the mockup style on the left side and copy the name in the field. On the right you can choose your mockup image that will be shown to your customers
Note: Sometimes the mockup images have the same name. You can decide if you wanna choose the Front, Right Front or whatever. Just add for example “Front >” before the mockup image name. So in this case it could be “Right Front > Navy”
5. Product Name
The name of the product in your template. T-Shirt or Mug for example. If you check “add to Title” it is for example: Funny Gaming T-Shirt
6. Price
Choose “Fix Price” if all your sizes have the same end price. For example 19.95 for every size of the shirt. When you check Profit this will be added to the normal Printful price. A shirt with size s could cost 18.95 and a XXL Shirt 20.95. You will earn the same profit for everything
7. Measure
We suggest to let them both checked all the time. Measurement sizes in cm and inch. Information for the customer about the single sizes.
8. Free Shipping
Self exlpaining
9. Exclude
In Flying Upload you edit your design for types “men / women / youth” and also a colour “black / white / colorful”. It does not make much sense to publish a black design on a black shirt. To make sure this never happens you can exclude specific settings. In the example above: Every design that is edited for white or colorful will NOT be uploaded with this template. It’s excluded
Note: By clicking “Deactivate” you can enable / disable a specific template. So you are able to upload on multiple templates at once.
…
.
4. Platforms With Specific Options
- Merch by Amazon
- Displate
General:
Some platforms have specific information you need for the upload. Amazon for example needs a brand, and has extra bullet point and description fields. All data that can be transfered from the normal Edit Window will be set automatically for you by Flying Upload. So you just have to add the platform specifics and you are ready to upload.
…
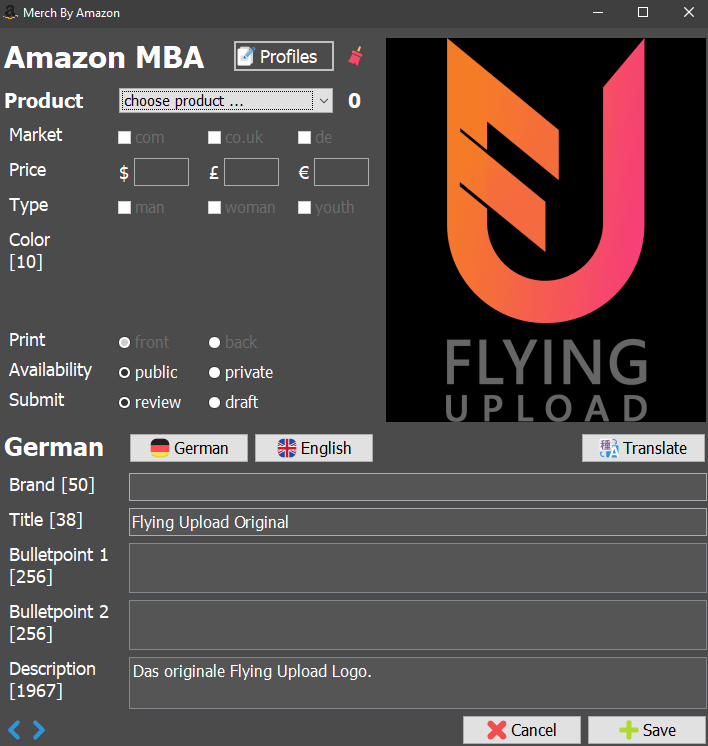
4.1. Amazon
MBA is probably the most special one. With extra brand, bulletpoint, description field and seperate prices for every marketplace. Simply add your information in the edit window for all other platforms like in the screenshot. If you now want to tag your design for Amazon, click on the “Amazon” button.
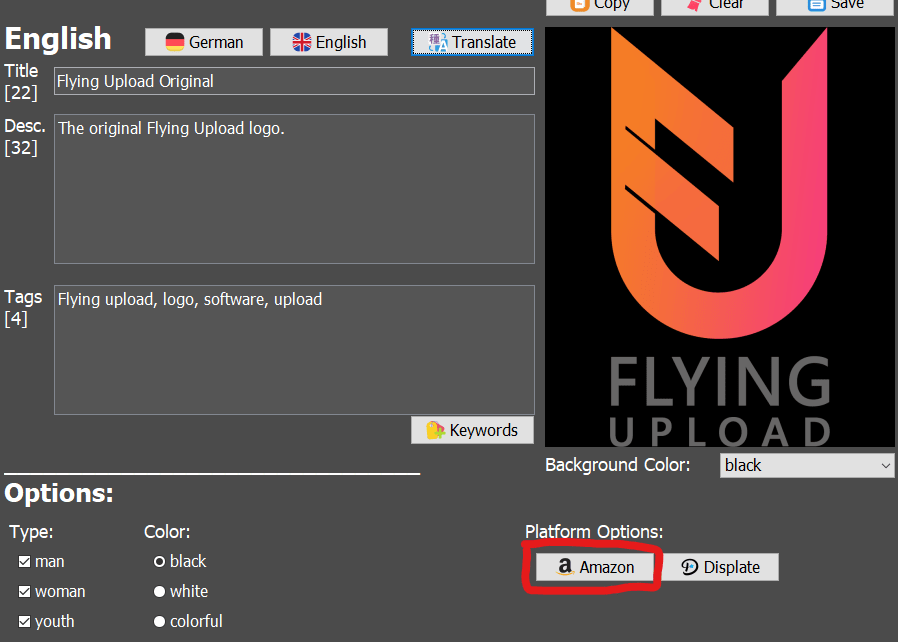
Now this window for MBA will open. You see that title and description are already set based on edit window. Now you can choose your product, edit marketplaces, price and types and set all other options, for example a draft upload. When you are finished, simply hit save. Now your design can be uploaded to Amazon!
…
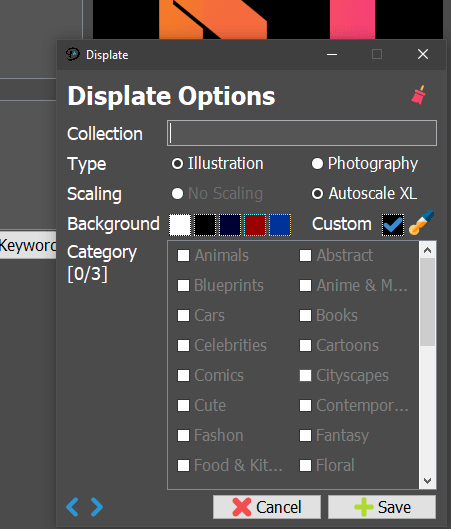
4.2. Displate
Displate also has specific options, but much simpler than Amazon. Again edit your design in the normal “Edit” window. When you want to upload your work to Displate, hit the red framed button at “Platform Options”.
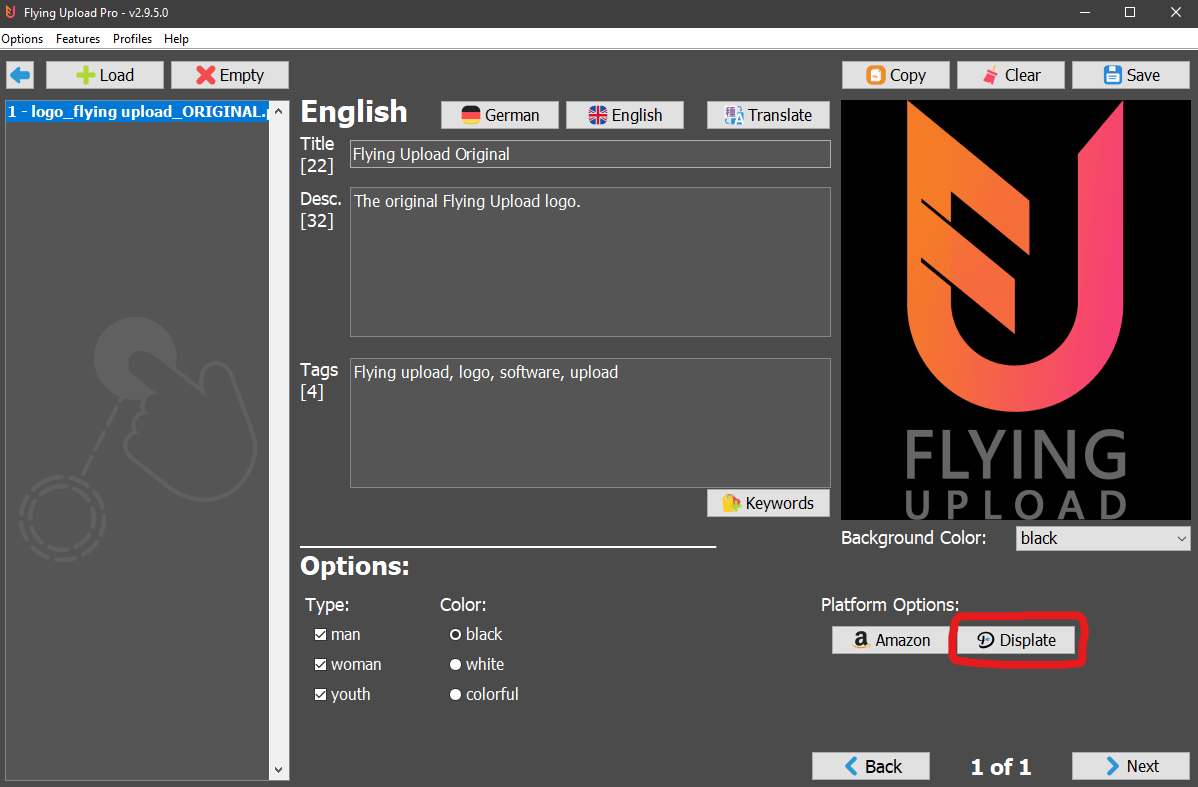
This little extra window will open. Add your collection name, set your background colour for your work and choose up to 3 categories for your design. Hit save when you are finished. And thats all! Flying Upload is doing everything else for you, like converting your PNG to a JPEG. You are ready to upload on Displate.
.
…
.
5. Addons
- Captcha Solving Service
…
5.1. Capture Solving Service
Some websites are using captchas during the upload to check if a human is interacting with the website or not. Our captcha system is solving this problem by sending only the riddles of the captcha to a human to solve the captcha.
The Captcha Solving Service is available for the following uploads:
- Zazzle
- Displate
- Threadless
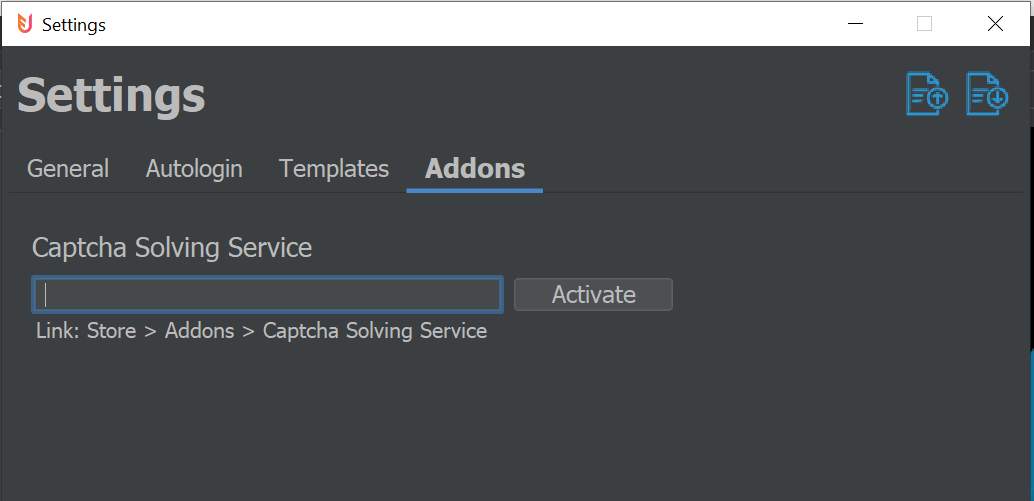
In order to use the service you have to get a valid license key (Store > Addons > Captcha Solving Service). Simply past your key in the “Settings Window” of the Upload Tool under the tab “Addons”. After your key is entered just click “Activate” to activate your key. From now on the captchas will be solved automatically during the upload (Note: this does not applie to the “Logins” of the websites).
Please note that the Login Captcha for Threadless and Displate have to be done manually. The upload itself is solved automatically with the Captcha Service. On Zazzle all Captchas will be solved for you.
.
.
.
.